It’s here! The long-awaited kitchen remodel DIY. There’s so much change that’s happened in such a short amount of time, which was a lot of work but SO worth it! If you’re looking for some kitchen DIY ideas, keep reading for all the deets about our affordable kitchen DIY project!
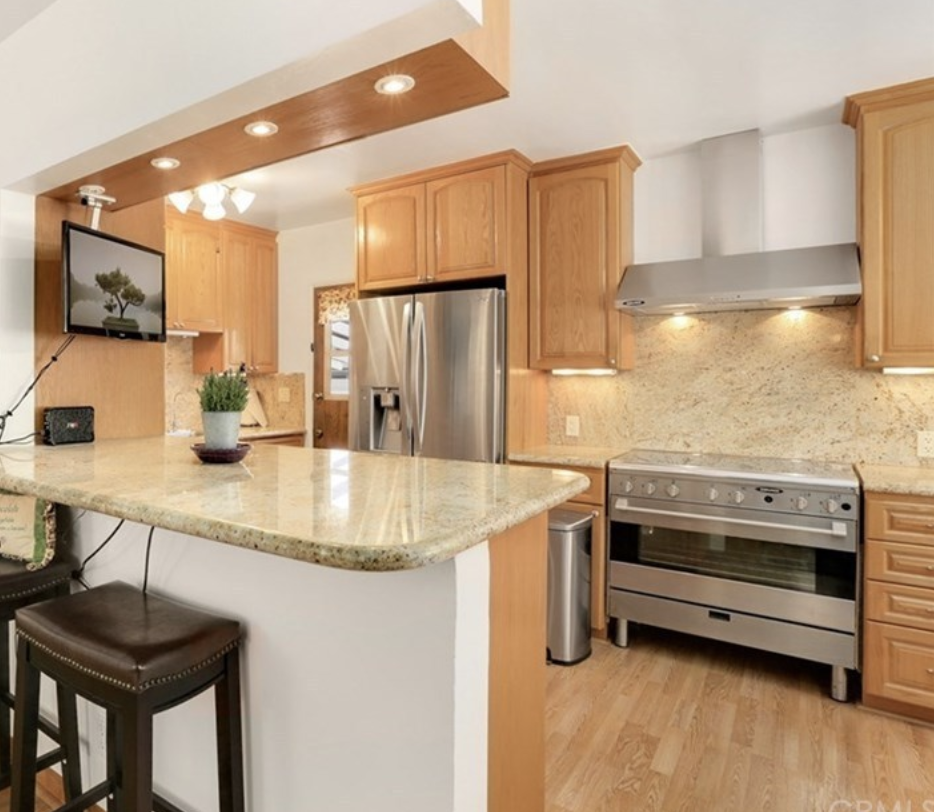
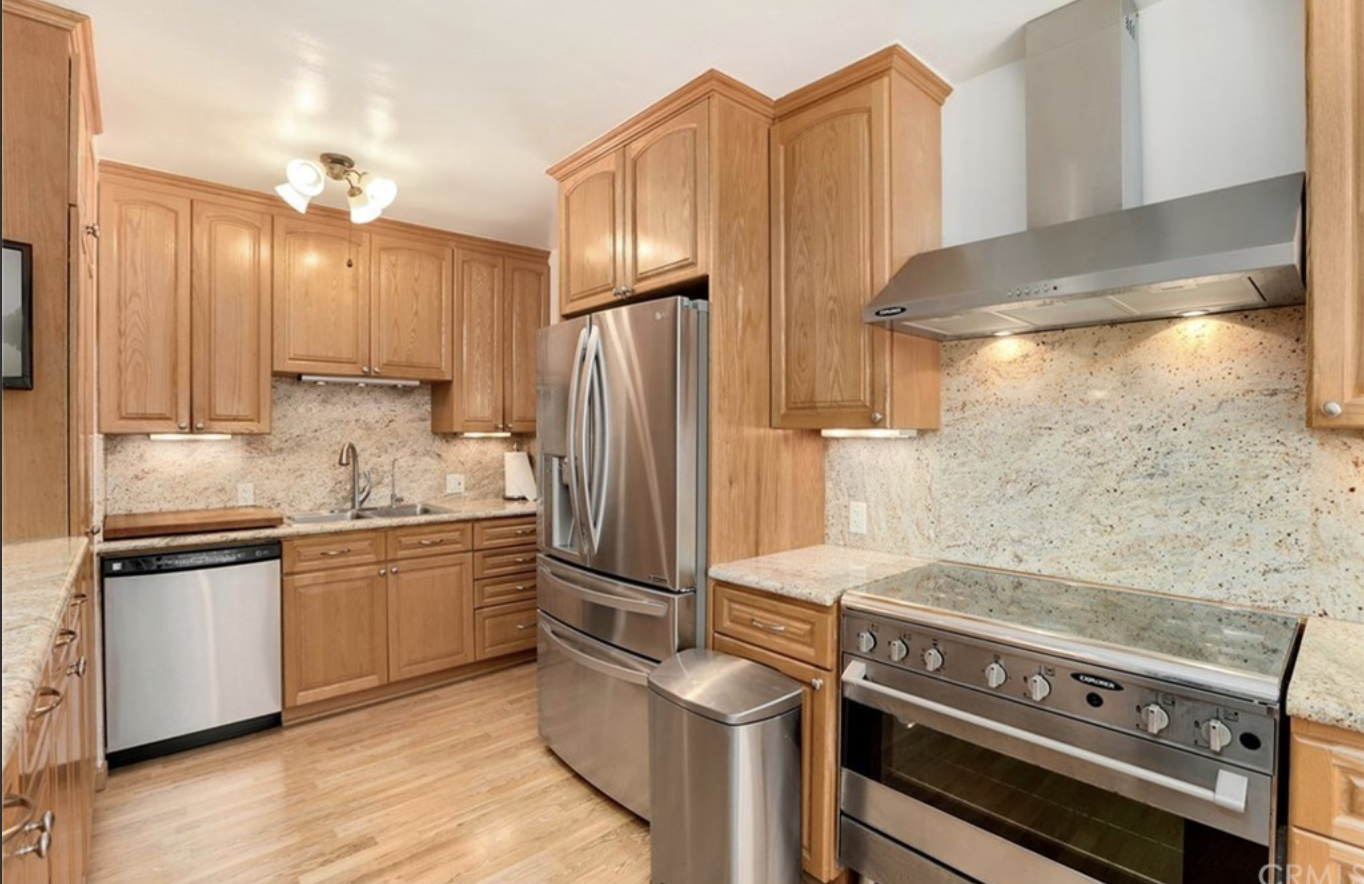
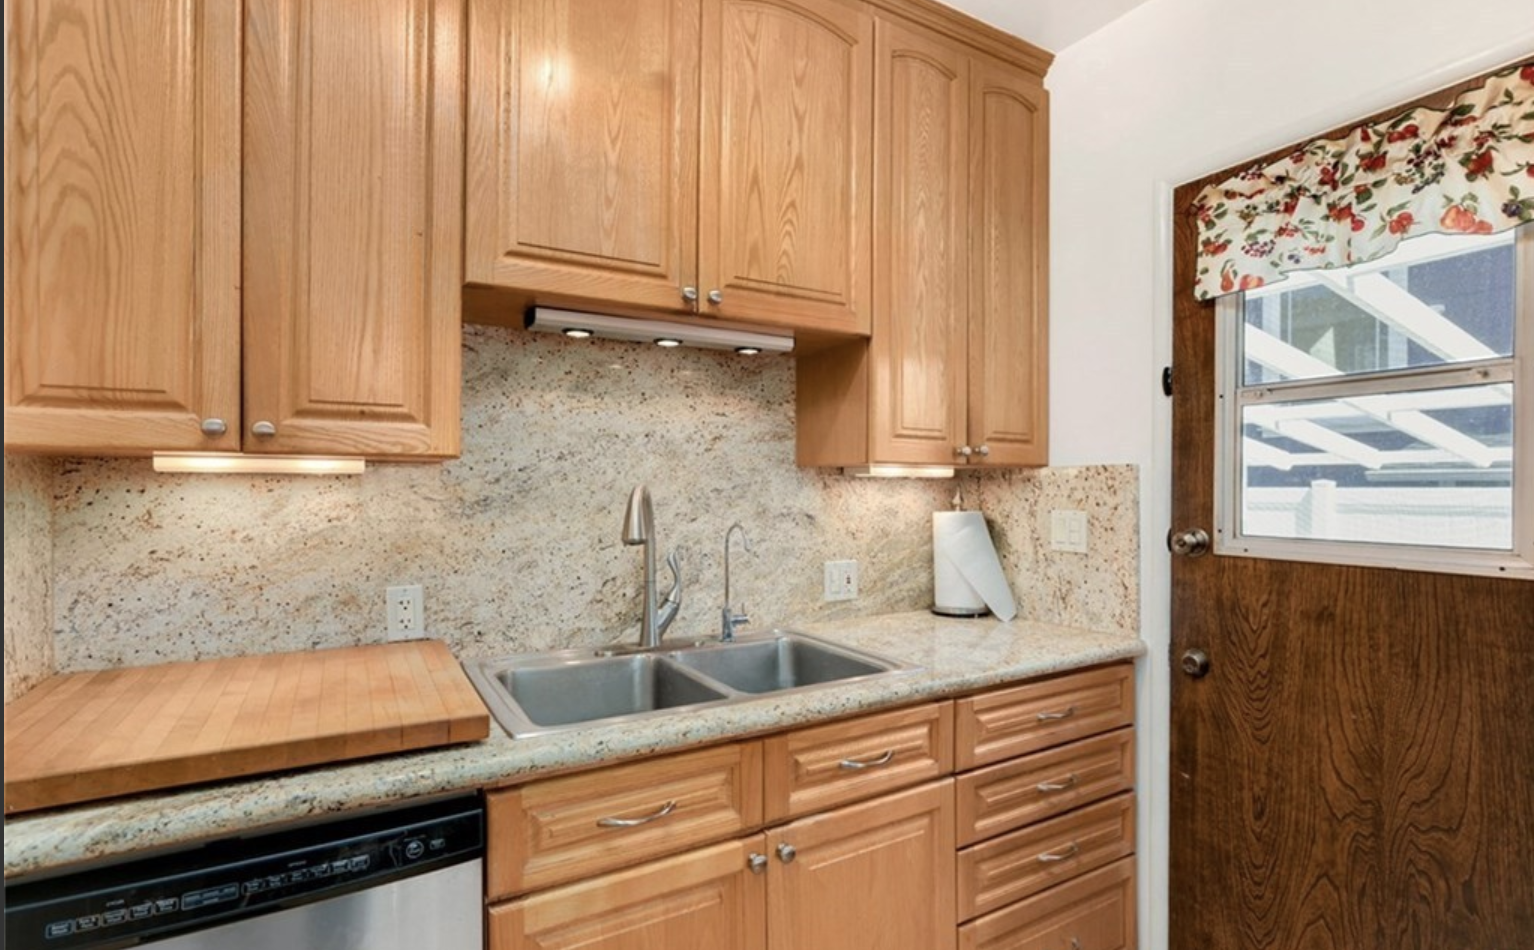
BEFORE
An impractical peninsula, granite counters, granite backsplash and LOTS of cherry cabinets dwarfing the space – NOT reflective of our style at all. We moved into this fixer-upper with the intention of a full gut remodel in a year or so BUT even in the interim, we want to enjoy this space as much as possible.
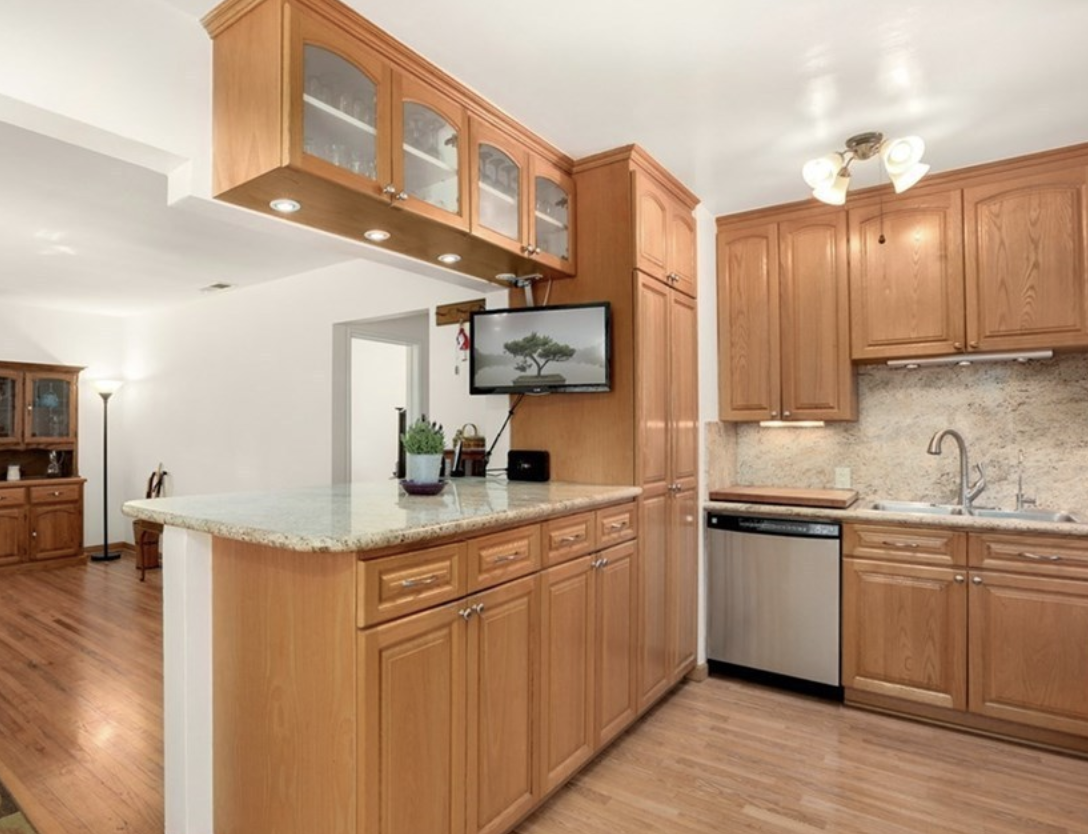
PENINSULA DEMO
This was easily the thing I was looking forward to doing to most in the kitchen renovation, and it was the most satisfying, too! This peninsula was so impractical and just barely allowed the front door swing past it at the entrance, so it had to go. The only negative of getting rid of it was the ugly holes it left behind in the floor, but that’s where plywood and a rug come to the rescue! Not only do these cover the disaster, but the rug really defines the space and adds more coziness. A quick and easy fix to a not-so-cute situation.
Peninsula and Wall Demo Tutorial
TOTAL TIME: 6 – 8 hours
- If your house was built before 1980, check the wall materials for asbestos and lead before you go knocking it down and creating dust. We actually did this after the fact (whoops) and thankfully, our walls passed the test – but don’t take the risk and do it before any kind of wall demolition.
- With the help of my handyman, we took out the lower cabinets (part of the peninsula) and the upper cabinets before taking down the adjacent walls.
- I let my handyman take down the walls, and luckily we didn’t run into any problems (electrical or structural).
- Taking out the peninsula, upper cabinets, and adjacent walls REALLY opened up the space but unfortunately left mismatched flooring. We patched it with plywood, and I found the perfect mat from Chiliwich to cover it up.
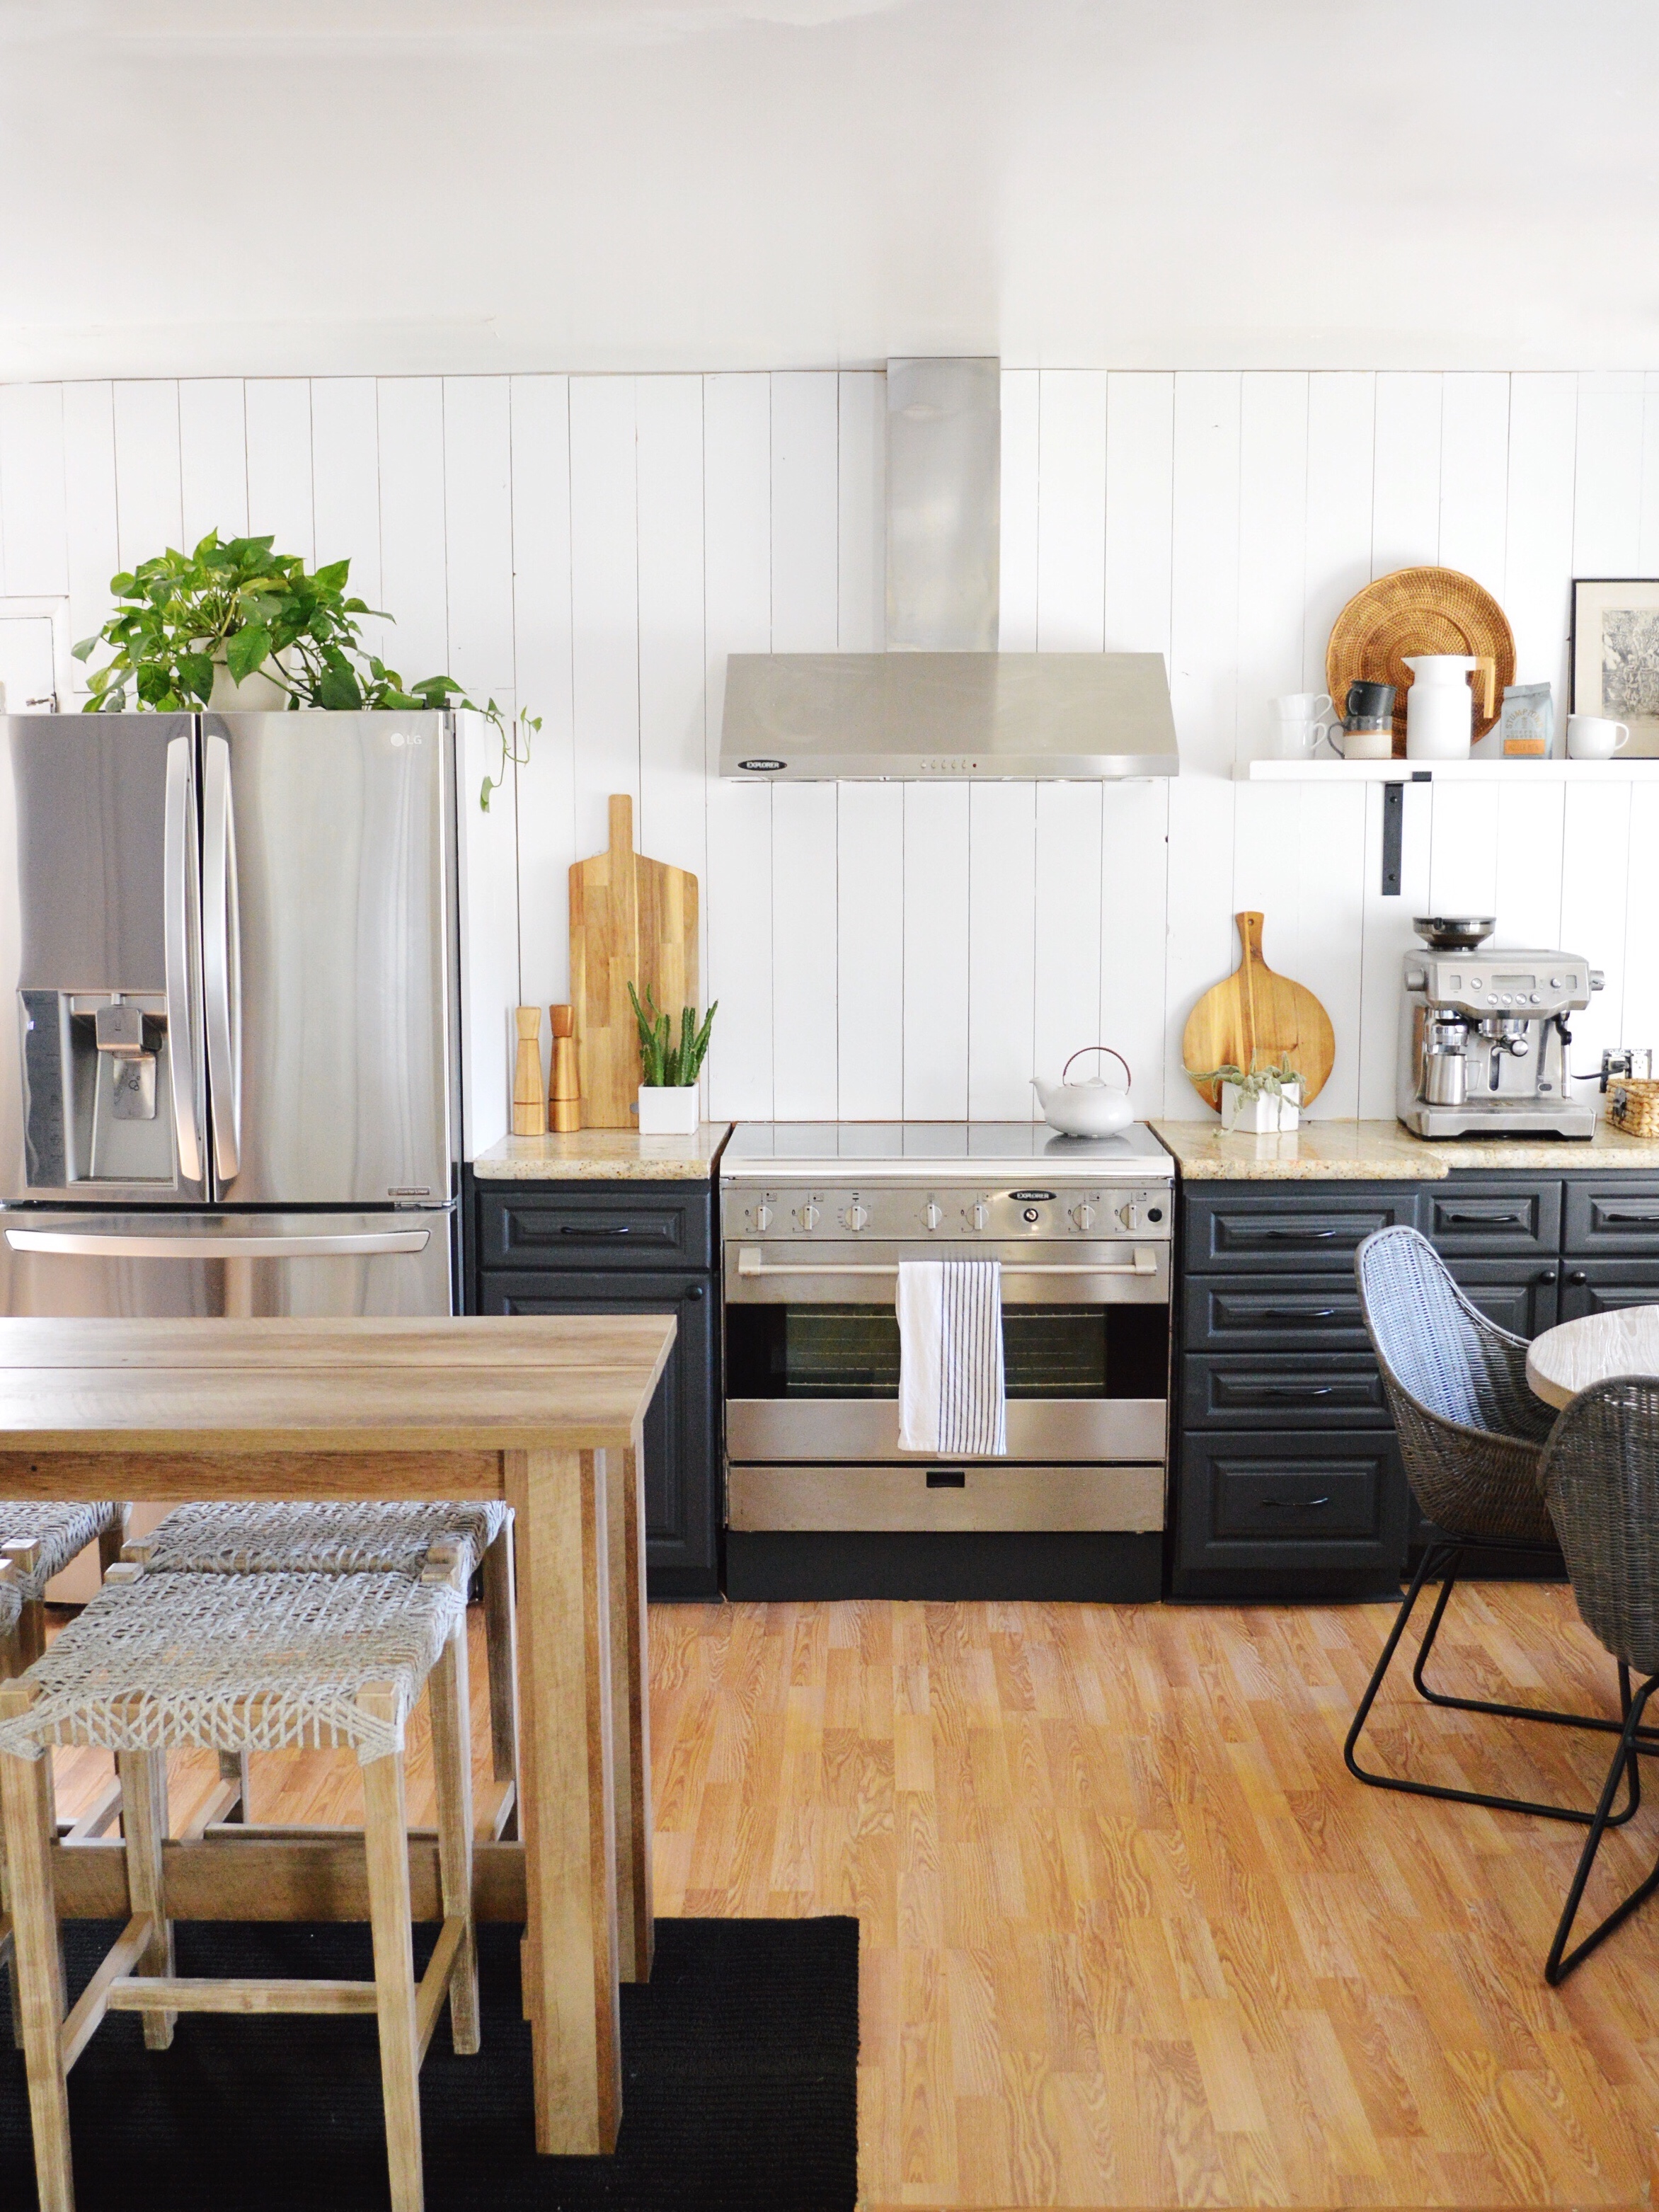
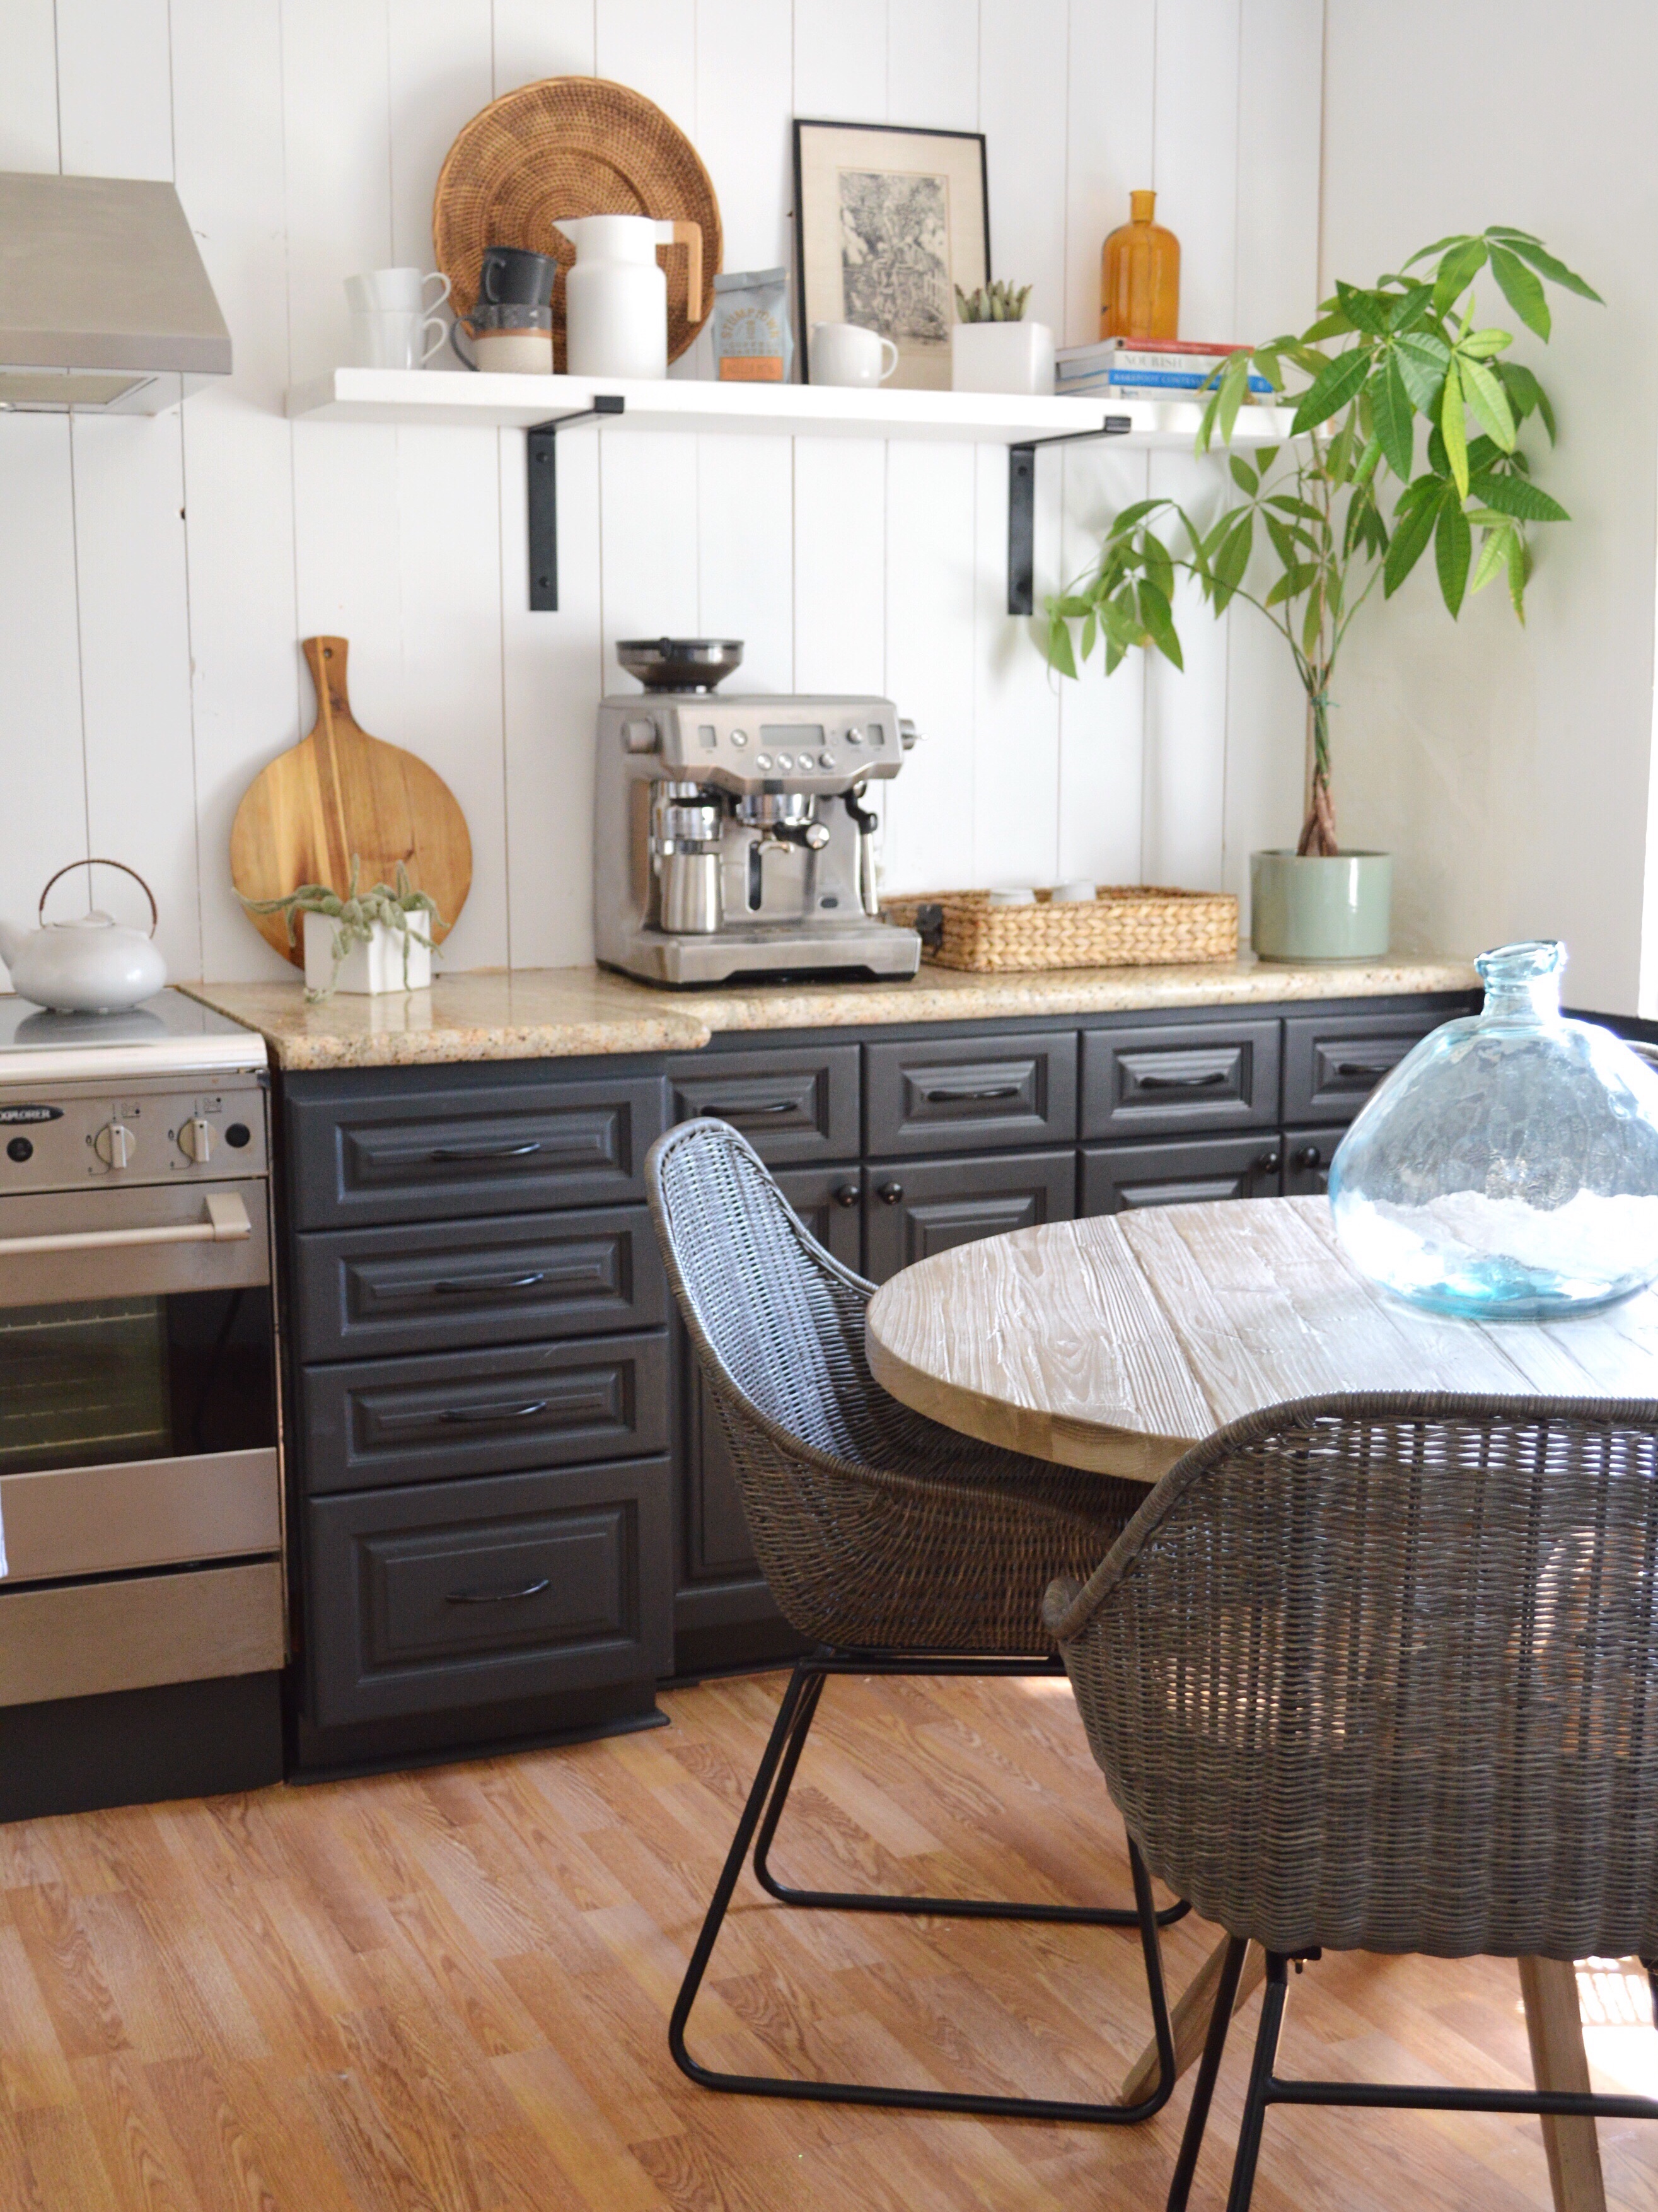
CABINETS DIY
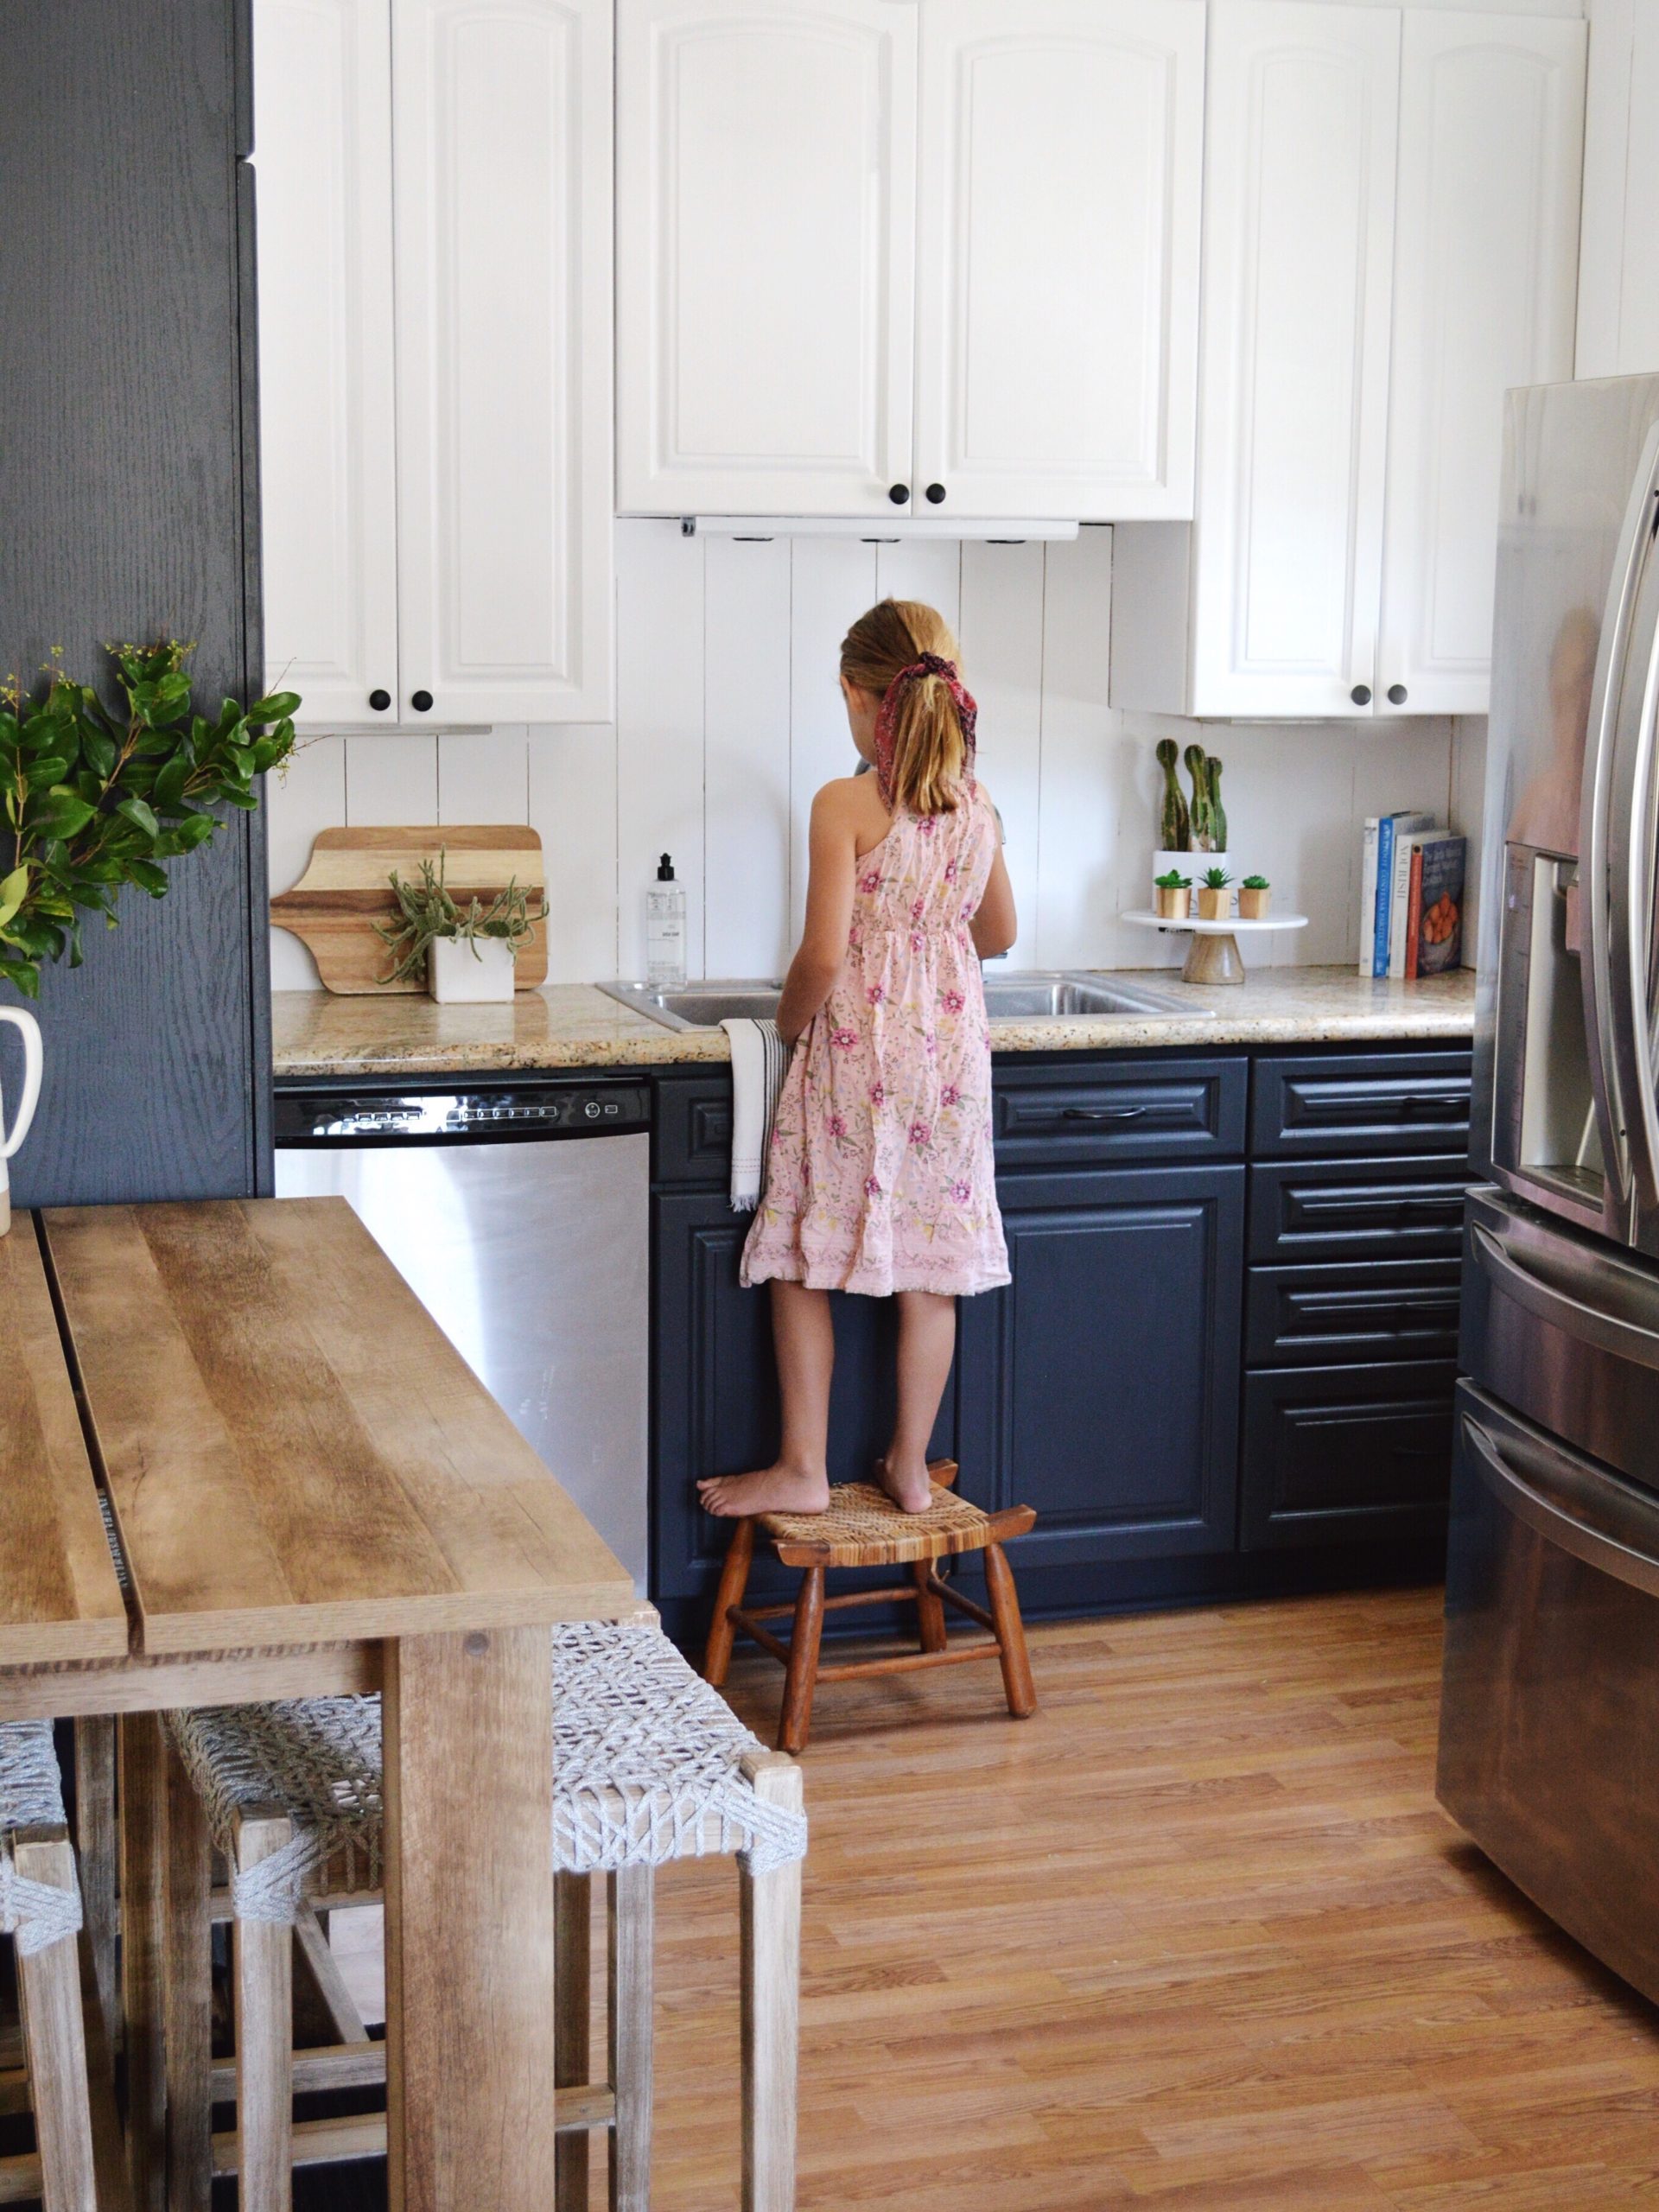
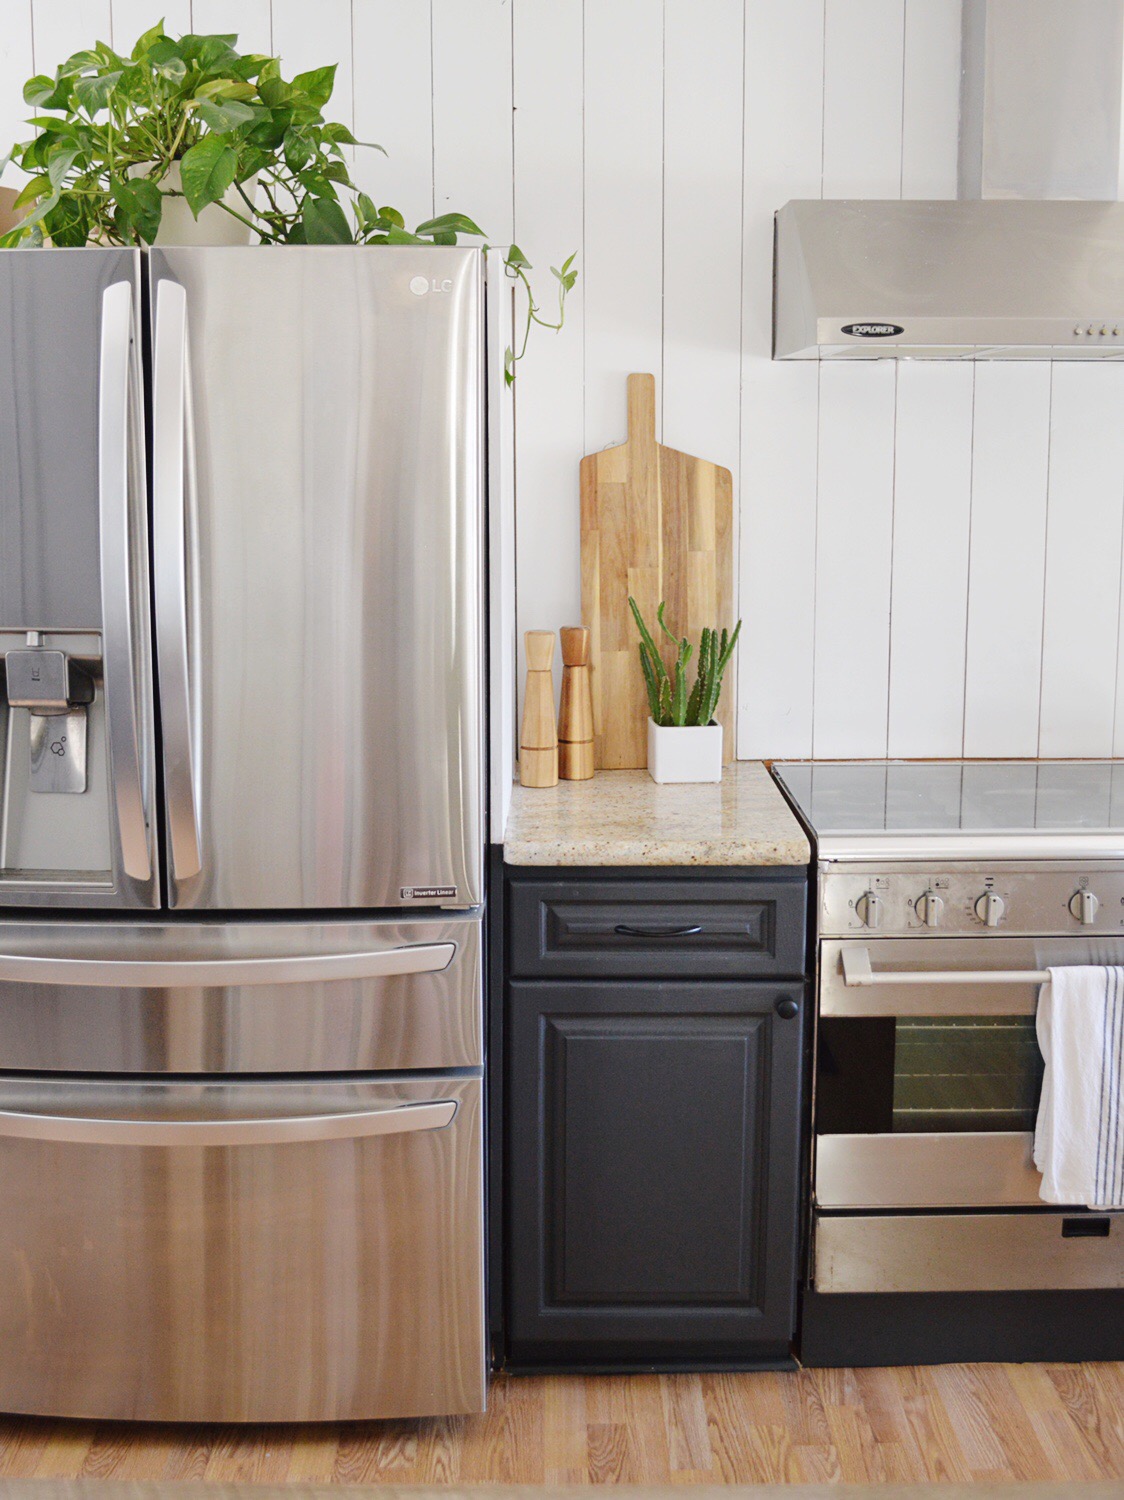
The cabinets needed some serious TLC. I ripped out some of the uppers to open up the space. As for the ones I kept, primer and a couple of coats of paint with a foam roller gave these cabinets a new life! I didn’t sand them since I was short on time (read: motivated to get it done) and it’s a temporary fix, but definitely sand yours if they’re keepers. I love this blackish-gray color from Benjamin Moore named Wrought Iron, because it gives the cabinets and the rest of the kitchen such a modern edge without losing the rustic beachy vibe I was going for. Add on the spray painted hardware, and voila!
How To Paint Your Cabinets
TOTAL TIME: 8-10 hours
- I removed each cabinet door using a drill (which makes it go SO much faster) and removed all the hardware, too.
- I primed each door with a sponge and used this oil-based primer and wore rubber gloves, which I strongly recommend because oil-based primer is a pain to get off, especially your skin! Wait at least a few hours for the primer to dry before starting to paint.
- I painted the cabinets with a foam roller similar to this foam paint roller, as I found the foam roller to leave the smoothest finish. This is definitely easy enough for a beginner!
- The painted the cabinets with two coats of the color Wrought Iron by Benjamin Moore in an eggshell finish. This adds a little shine and is easier to clean but is not too shiny.
- Once they were dry, I screwed the cabinet faces back on. I didn’t bother painting the inside of the cabinet doors, except for the ones we open frequently, which are the pantry and glass cabinets.
- I spray painted the hardware black, let it dry, and put it back on the cabinets. I used this black matte spray paint.
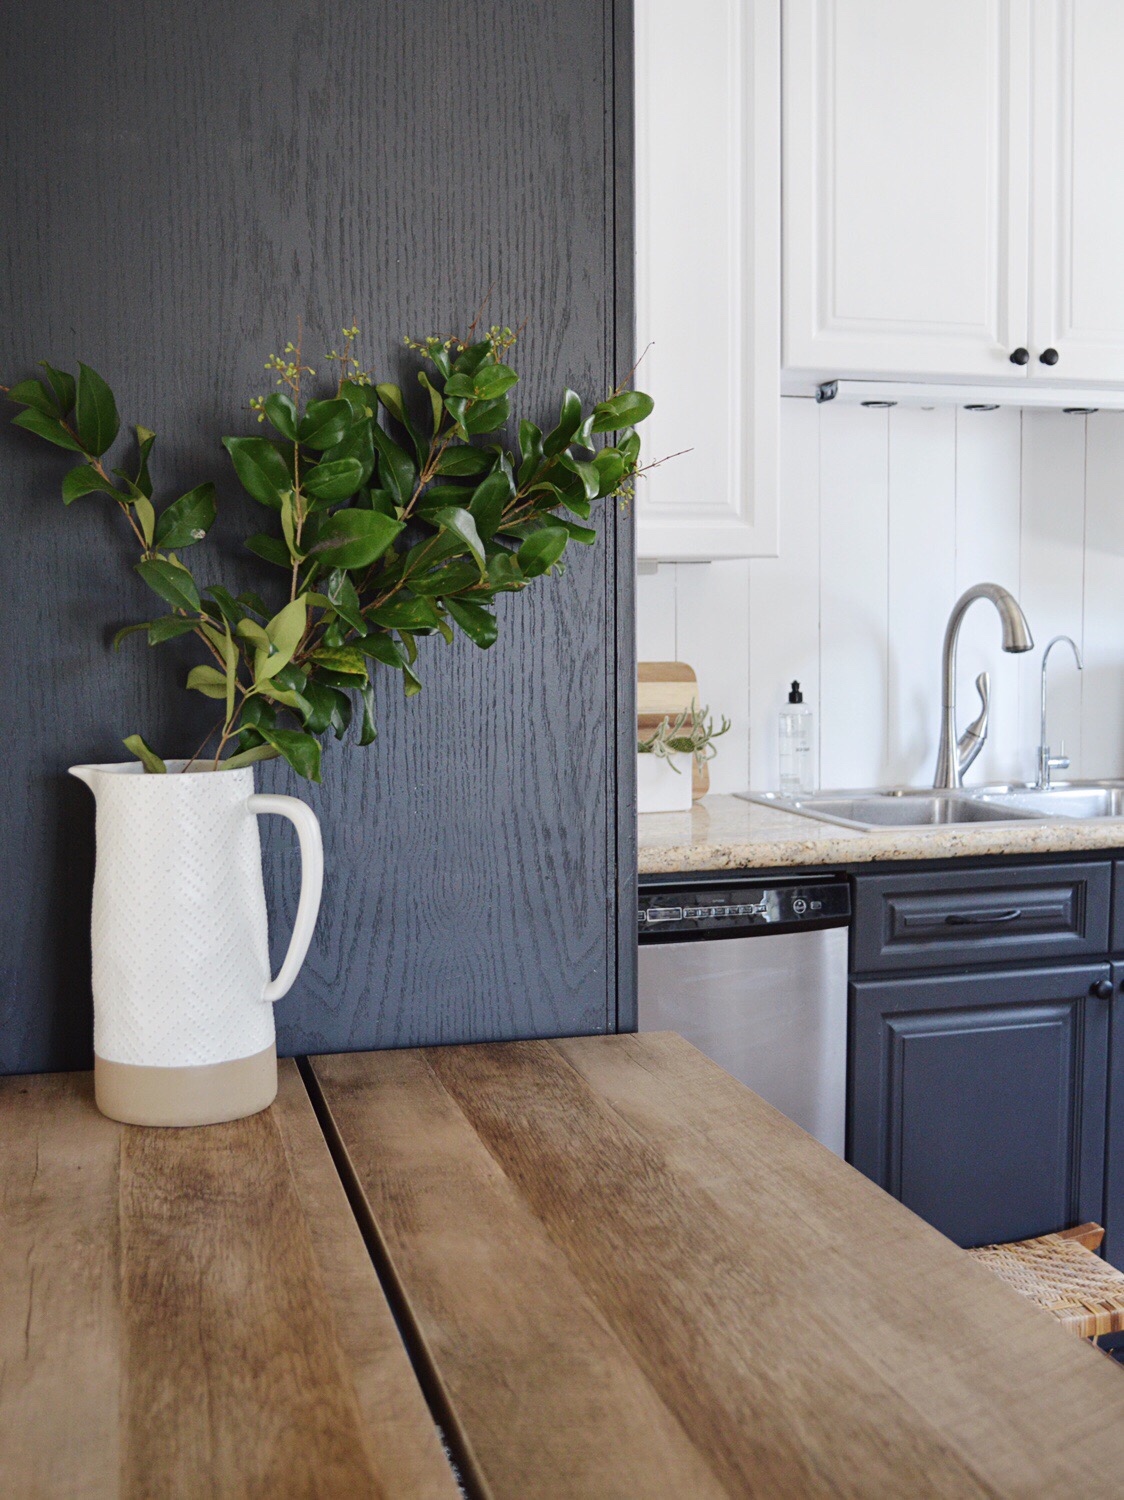
PLANK WALL DIY
For the plank wall, we used 1×6 common planks and stuck it to the wall with gorilla glue. Because the walls are made of plaster, using nails wouldn’t have been as effective. This is a great inexpensive alternative for tile backsplash, and it is also a unique choice that adds some visual warmth to the space.
Speaking of warmth – if you’re considering doing a plank wall DIY in the kitchen behind your stove, be aware of the clearance between the wall and the stove so that the plank wall is not a fire hazard. Check your local codes.
How To Make a Plank Wall Tutorial
TOTAL TIME: 7 hours (shopping, installation and paint)
- We bought this 1×6 common board from Home Depot. The total cost for all of the wood we needed was $125.
- My handyman cut it down to size and used gorilla glue to attach it to our plaster walls, as nails would not have held as well because of the plaster, and the planking only went from ceiling to counter and not all the way to the floor.
- I primed the wall the same way as the cabinets, then painted the wall with a regular roller using Distant Gray by Benjamin Moore, also in an eggshell finish.
- For safety purposes, check codes about putting it behind your stove!
OPEN SHELVING DIY
Who doesn’t love open shelving? There are many benefits to having open shelving, including the way it makes your kitchen look brighter and feel more spacious – both two things I absolutely needed. This is a simple DIY that only requires brackets, wood, and your stain or paint of choice. Know the measurements of your wood before going to Home Depot, as they will cut if it for FREE! That’s definitely in the budget ? And don’t forget to sand these down before staining or painting.
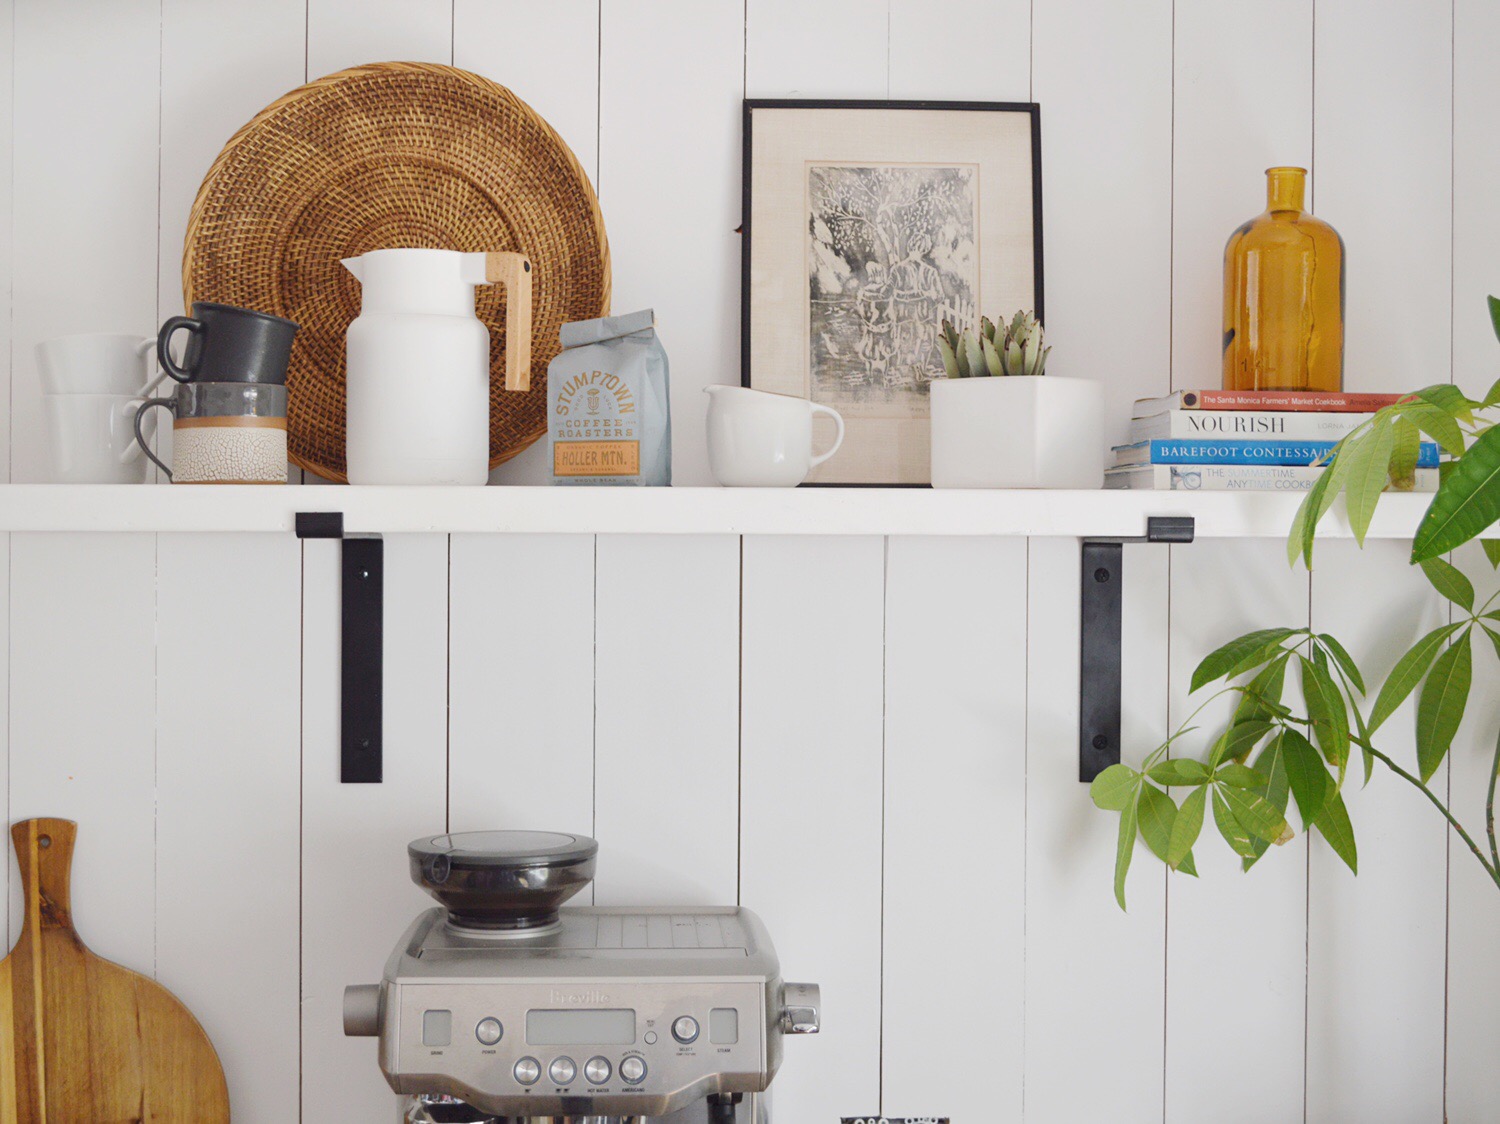
Easy Open Shelf DIY Tutorial
TOTAL TIME: 3 hours
- I bought this 2×12 wood plank and got it cut to size at home depot for $15. They cut your wood for you for FREE so make sure to arrive with your measurements.
- I bought these brackets for $13 each. I kept mine black, but spray paint is always an easy fix!
- I sanded the wood afterward at home with my Dewalt orbital sander.
- I painted the wood with only one coat of the same Distant Gray by Benjamin Moore paint color as the plank wall.
Yay! I’m so happy with this progress so far. It’s feeling like a totally different space already, and I’m excited to get the styling series of our kitchen update! Coming soon! I hope this gave you some inspiration and helps you with your own kitchen DIY ideas. And don’t think you have to do anything major – every small change and effort counts!
Stay tuned for Part 2 of the kitchen remodel blog, which will focus on how to style a kitchen, kitchen light fixture ideas, and so much more. I can’t wait until it’s all done to share with you! In the meantime, you can find all this and more on my Instagram and Pinterest.